Tuesday, February 25, 2014

What happens when you spend 11 hours in a costume shop?

You can barely see
 the markings 

Epaulette!
You miss daylight completely, or and you get a lot done. I started off the day working as an intern for a
few hours which meant I got to continue on that bodice for The Rover. It now has sleeves and little epaulets attached. It's done for now until the next fitting, then we can add the little tabs to the sleeves. I basically spent a good chunk of time tracing and trying to find a marking tool that would appear on the interfacing fused onto the fabric. I found that you can see yellow tailors chalk really well, but when I ironed it went away so then I proceed to tried like 4 other things, yellow wax pencil, white wax pencil, white tailors chalk and finally just settled on the pink water soluble marker, it was the easiest. I put everything together, the sleeves are out of a very nice white eyelet fabric, It looks very nice with the wine colour.
Bodice with sleeves and epaulettes 

After that was all put together I took a quick break to eat food, that was the only time beside 10:30am that I saw daylight. When I got back I went to work on my project, I was looking over the schedule in the syllabus and was pleasantly surprised when I realised I am already a week ahead of schedule. This week I'm suppose to be working on but the Male mock together, when I'm actually finished and starting on the female. I also was laughing because did his Howard, I'm gonna use the wrong word thing. It say that I should "start switching fabric", it took me a second to figure out what that mean, he means I should start swatching fabric. Oh, Howard.

The only thing I had left to do on the male mock up was just put the sleeves on the coat, and make a collar. That took like 30 minutes, I already had to sleeve cut out. But, the collar was a little tricky to get the right shape, its not the best picture of the collar in the render. What I realise is that lapel shape needs to be changed and once I did that the collar looked in place. Now that male is done until we get Zach in to fit him, and then it will all have to come apart again to make adjustments to each pattern piece before we cut out the real fabric.
Bodice pieces all traced

I move on to start cutting out the female, I have all here pieces into paper patterns now. There all a weird looking, thats what happens when you drape, thinks aren't as straight and "normal" looking as when you flat pattern. I was able to get everything cut out, Howard wanted me to test the front skirt first before I cut to out. It a shape that you wouldn't expect the skirt to be, so I cut on out to test and it still works the way I originally draped it to. I then proceed to cut two out, I didn't feel like cutting the underskirt or the back of the overskirt out yet since those are really easy and I know there going to work. So I decided to start to put together the front bodice and over skirt to make sure the piece all fit together. At the point how came singing into the shop, he is also slowly trying to convince me to wear the girls costume to graduation in May, which is just really funny.

 He keeps saying how he wished we could have started doing these years ago with me, which if I knew actually what I wanted to go into 3 years ago I totally would have. I think I had an idea of where want to go after college better then most people, I've always know I want to go into theater and work in costumes. Which is pretty specific, I took me till this year to realise I want to go into theater and work in costumes and work in the construction and management end, which is super specific. It was nice to hear him say the this by doing this and having these skills I'll get more jobs, which is what I've know along, but it was nice to hear a professor say your good enough to be employable, especially in theater.
Hi Mary!

TOP HAT TIME!
After that all happened I start to but gathering stitches around my whole bodice, the whole thing is gathered around. I then sorta flatlinned it to and under little bra piece I made that give the garment its shaped. After all that gathering I'm really starting to like tailoring more and corset making, you get sick of gather after a while. After all the gathering and one it was flatlined to the under bodice, I attached to the waist band. I then went on to the skirt, I decide to put pleats in the skirt where its all gather at the hem. Before I put the CF together I had to put those pleats in, those are what gives the hem that unique shape. Once all that was done it was time for more gathering stitches, I put those along the waist line where they needed to be. There are two different amounts of gathering on the skirt so I had to make sure I had less gathering at the CF and more towards the sides. Then it was time to attach the skirt to the waist band. And then I had the whole front half of the girl done, oh did I mention I did all this while wear one of the mini top hats I made for The Merchant, I look adorable. Tomorrow if I get time I think I'm gonna either do the under skirt or the back.
My lovely German Couple


Monday, February 24, 2014

A little detour from project

Everything flatlined together
This is't related to my independent study, I decide to take a little break this weekend from it. But today I did actually get to put together that bodice I mentioned before. I was actually surprised as to how much I got done in just one after noon. Remember I said that I had retraced and cut the fabric out, but nothing was put together. Well it was in that same state when I started today, everything cut out but nothing together. So I started by flatline all the fabric (the pretty outside fabric) with the under coutil fabric. If you don't know what flatlining is its when you lay everything together and top stitch around the edges so that they lay flat together. I did that to all the pieces, there is a CF,  2 SF, 2 SSF, 2 SB, and 2 CB so in total there is 9 pieces to the bodice, and remember that is doubled because those are cut out of the coutil, and then the real fabric. Once I got everything flatlined, I put my seams with a 1/2 inch seam allowance together, which was the CB to SB, SF to SSF, and SSF to CF. I then serged all the seams together and serged the edges of the CB separately and the SB and SSF seams separately since there seam allowance was more then a 1/2 inch. The reason those down get serged together is because if the fit needs to be adjusted, you would either take it in along those seams or let it out. Thats also why there is more seam allowance along those seams.

Inside coutil, with boning tape. Everything is serged and
stitched together, but no cording yet.
Seam allowance is costuming is different then in commercial garments. If you buy a commercial pattern the seam allowance is going to be 5/8 inch. Commercial patterns are not made thinking that multiple
people may be wearing this in the future, there for they don't need to be as easily adjustable. In costume you want to put extra seam allowance in, because after the show is done this costume will go into of stock and could be used 20 years down the road, for another actor. Costumes have a long and interesting live they must constantly be evolving from show to show, that is why in costuming things are constructed differently then in commercial or fashion wear. It doesn't mean one way is easier they just emphasise different things. For one in costumes an important part is what type of closure is being used, does it need to be a historical closure or a closure for a quick change. In commercial/fashion sewing that isn't as important, the more important question would be if its aesthetically pleasing.
Cording before its attached to bodice

So back to the bodice after I serged everything, I stitched the SB and SSF seams together . I then began to cut bias tape for the cording that will go around the neckline and around the waist. Cording or piping is a common way to finish off edges and can also be use to add a decorative touch, if you use a
Bodice almost finished with cording around
neck and waist
different pattern or add it to outline seams to make them stand out. In this case we are finishing off the edges, so it was cut with the same fabric. You make cording by cutting 2" strips of fabric cut on the bias. The bias is when the fabric is cut at a 45 degree angle across the grain, when fabric is cut on the bias it has a stretch that allows if to bend easily around curves and shapes. Your then take a cord and fold the fabric around it, like a hotdog in-between the buns. Using a zipper foot you then stitch as closely to the cord as possible to incase it. After I did all that I serged the cording for a finished edge. I then stitced the cording around the neckline in the front and back. I had to slit the side seams a little bit because I forgot that the cording goes on those pieces before they are stitch together and I put the cording at the waist and stitch back up the side seams. I then trims the extra seam allowance on the bodice to be even with the cording's seam allowance, so it look nicer on the inside. I made sure to clip around the edges along to curves so that it would lay flat and then pressed everything down and to the right side. Once everything was press I went back and top stitch around the neckline and waistline to make sure the cording lay flat. I also forgot to mention before that I had but all the boning in the bodice before hand. After I did all that there was nothing left for me to do, I just put the shoulder seams together, but the bodice is going to have some off the shoulder sleeves. But I havn't been told what fabric those are going to be cut out of so I have to wait to put those on. I also don't know what kind of CB closure this is getting so I wasn't able to move to that step yet, but thats ok because I didn't expect to get that far this after noon anyway so hopefully I can finish it by the end of the week. Which I think is completely do able.

What's nice about this is I didn't have to worry about patterning or fitting anyone I just go to put it together. It a relive when you just get told here sew this together and thats it.
Back view you can see that there
 isn't a back closure yet
Side veiw

Sunday, February 23, 2014

Some lovely pants

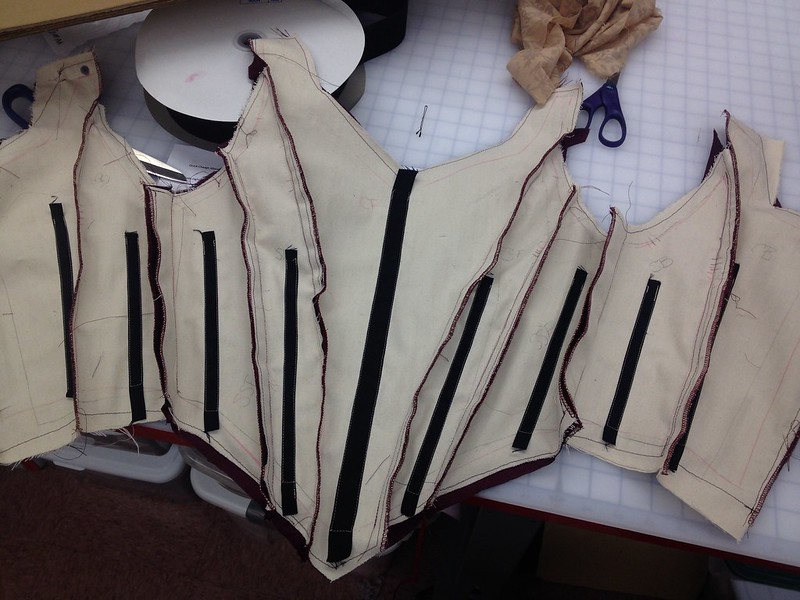
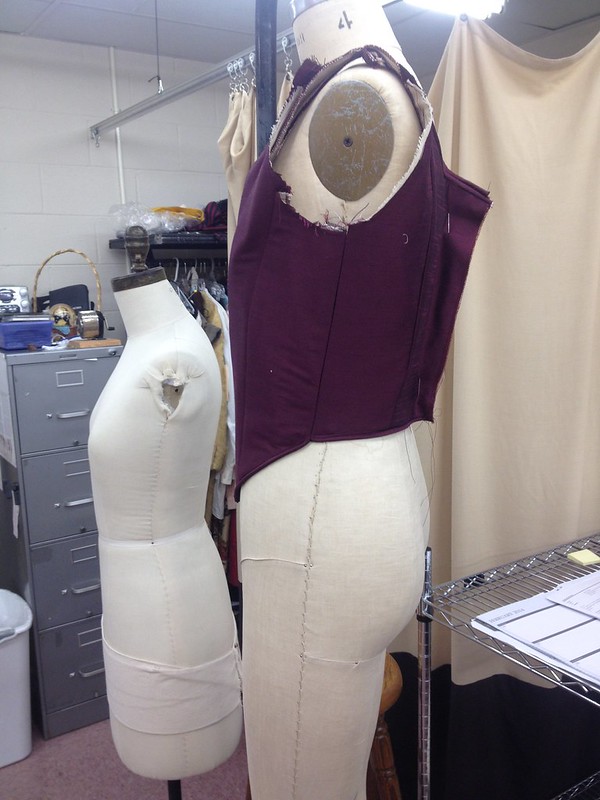
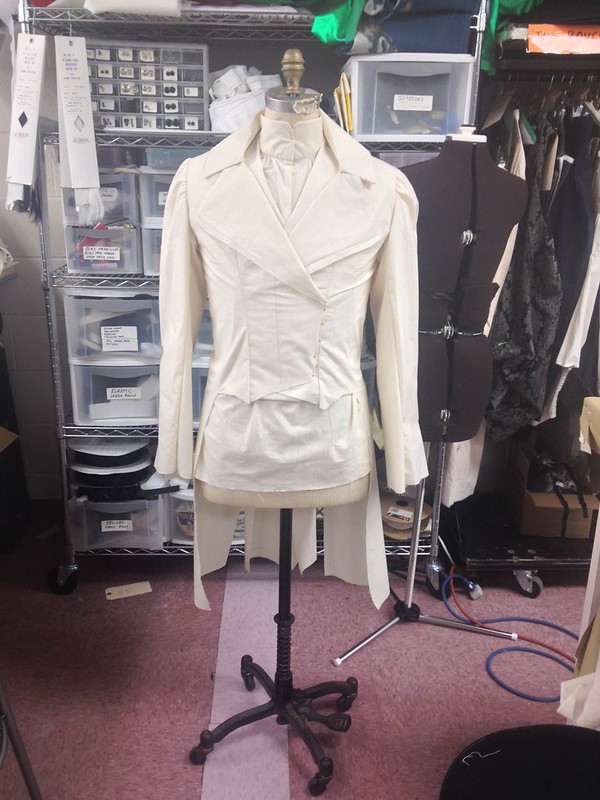
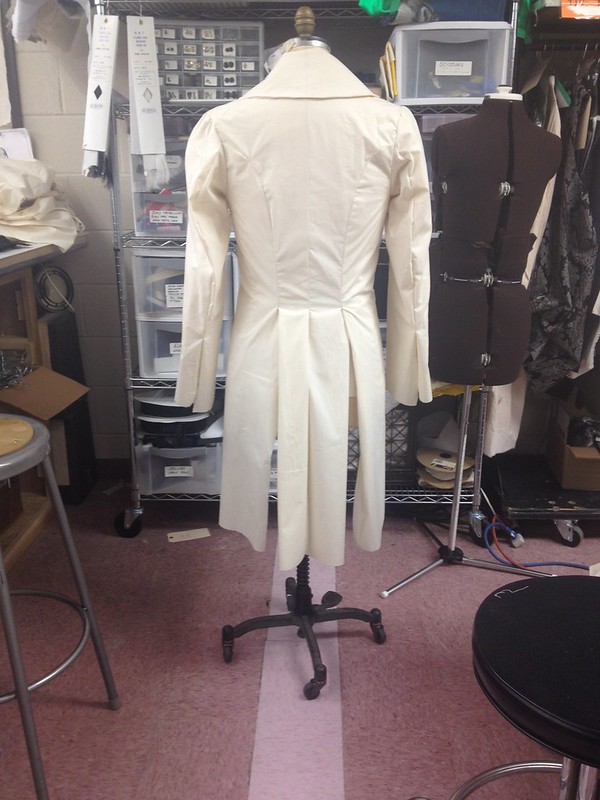
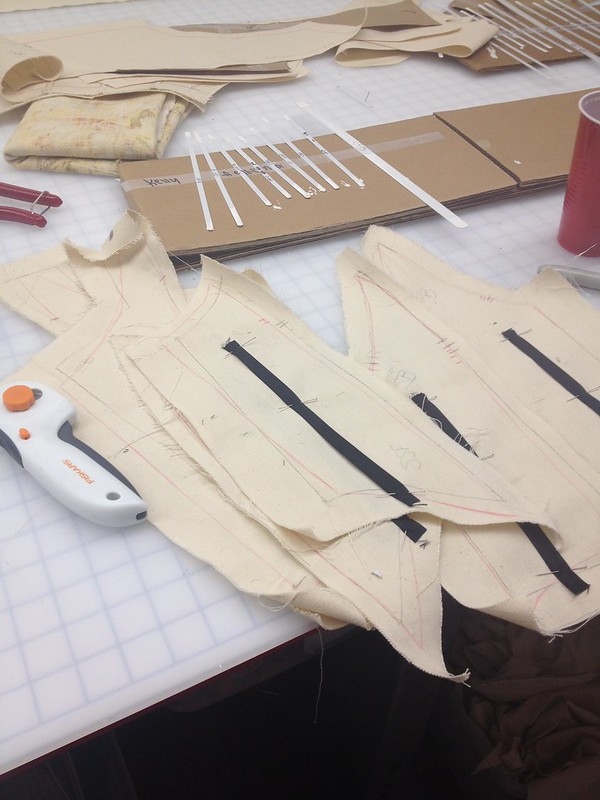
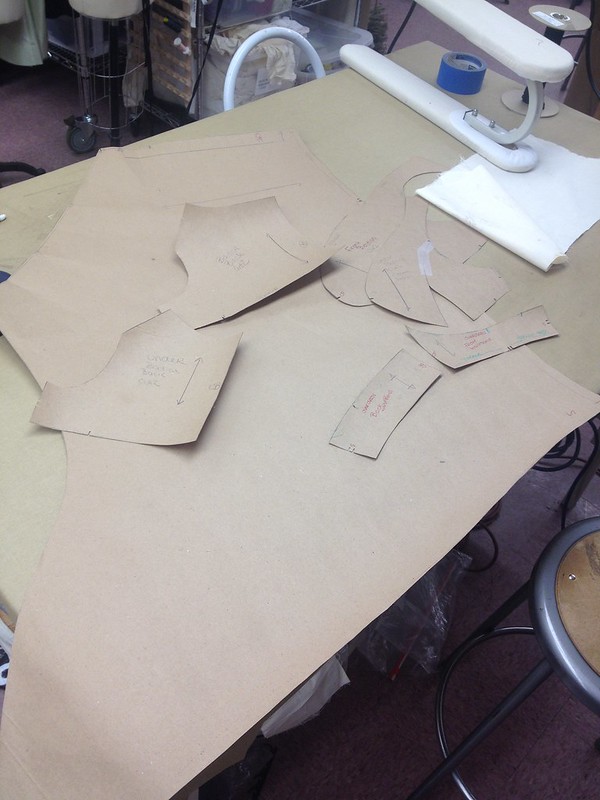
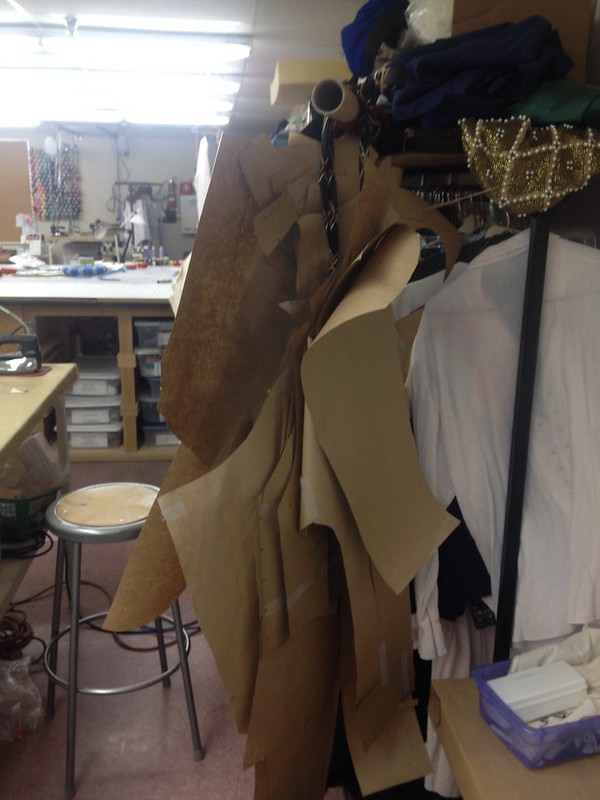
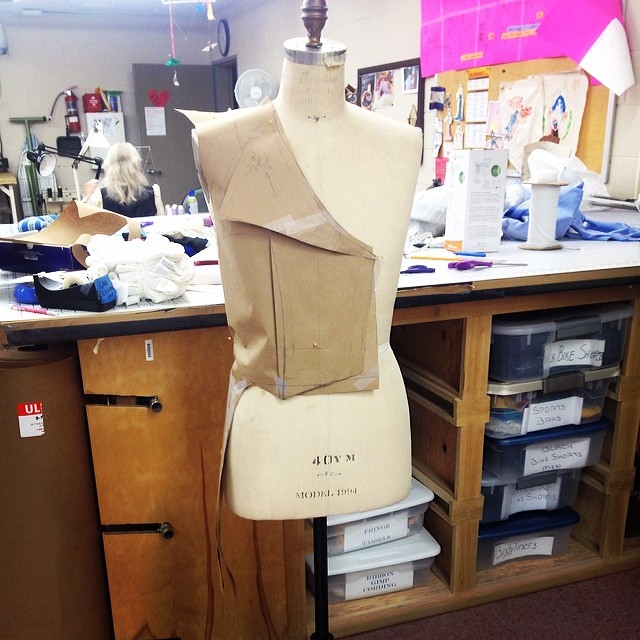
I'm finishing up all the mocks ups for the male, there is soooooo some piece. I don't know why Howard chose the only image of a male that has this weird extra coat. I like I keep trying to find some information on what its purpose is or if anyone else had one but I just can't, is dude just had his own style I guess. Its not that the coat is difficult its just another added piece to the shirt, waistcoat, tailcoat, and trousers. Not to mention that each pattern has at least 4 or 6 different piece to it, everything but the pants and vest, has a different sleeve, different collar or different lapel. The seams on the coat and tailcoat are the same, which makes it a little easier. But the lapels, collar sleeves, and cut of the two are different. But as far as constructing a mock up the quicks to sew and cut out has been the vest, tailcoat coat.

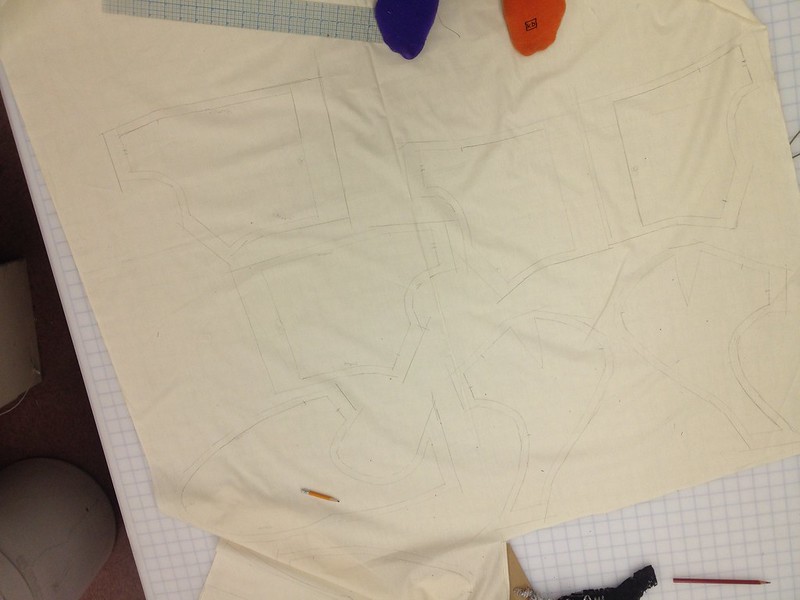
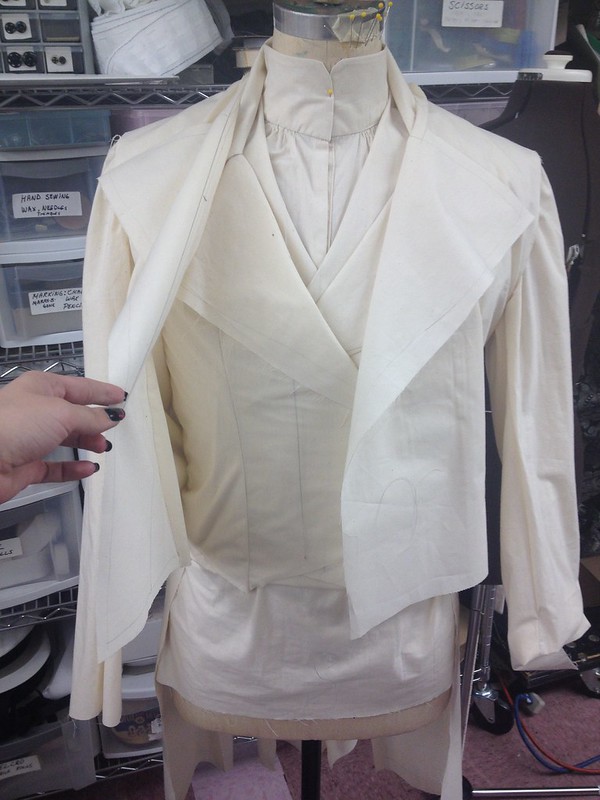
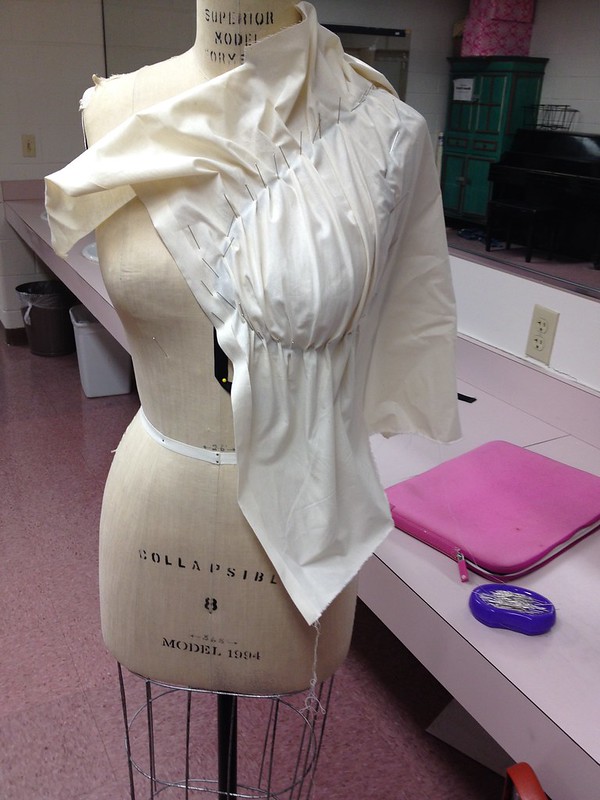
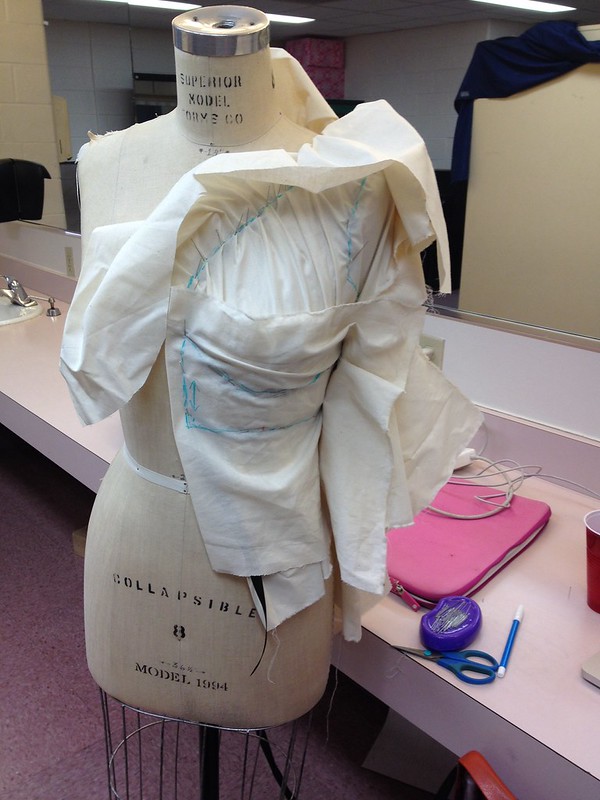
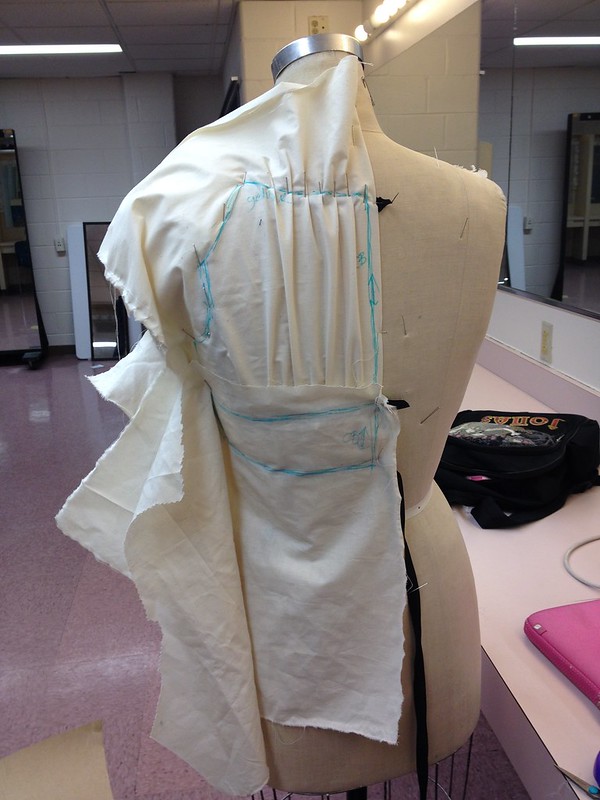
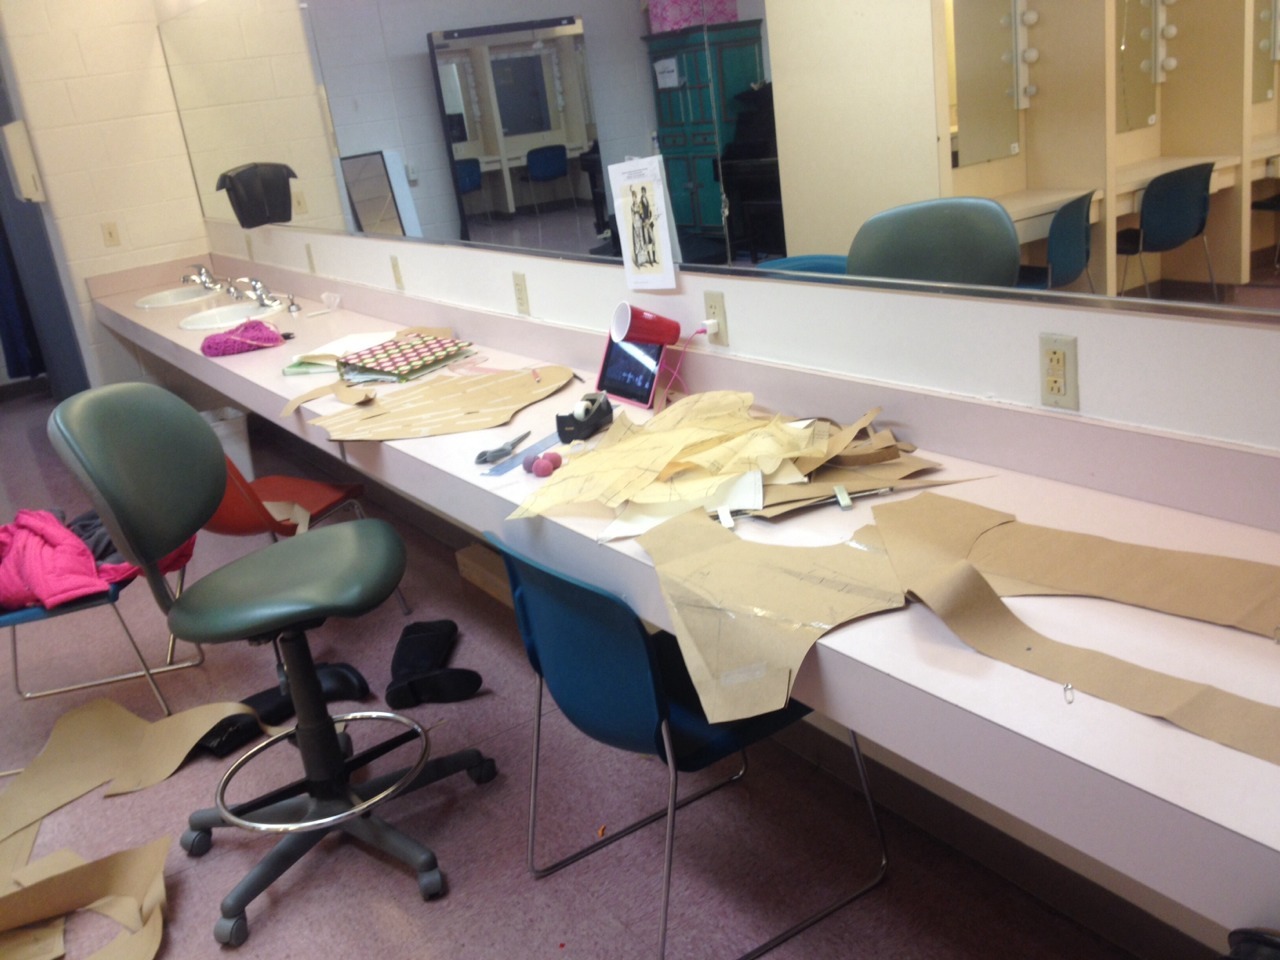
You would think the shirt would be, it just takes a lot of time because there is so many bits that need to be gathered, plus there is a standing collar, cuffs and plackets. I also hate how I did the pattern for the shirt, in my research I found that shirts back then were just rectangles with gussets in the neckline and armseye. They were a big fan of gussets back then, even the women's short stays at the time got there shape from jus gusset. The thing I really want to change on the shirts is the sleeves, the gathering at the neckline and the shoulder seams. I already started to alter the basic shapes of the patterns, if I had the time I would totally make another mock up shirt, but I don't. Every day this week I have been in the shop till midnight working. One of the reason it keeps taking so long is whenever I start to put something together I have to stop and stare at it on the dressform and readjust it to make sure everything is going together right. 

Monday was the worst I was there till 12:30am I had packed everything up and got to the door to leave and saw it was snowing out. And I was not dressed for snow, I seriously had a moment where I seriously thought about just staying in the shop all night. I could have I had my books for the next day and change of clothes and a shower and food. It would have been totally do able especially since I would have to be back for my 9am class the next day. But I decided to brave the snow and it took me like 30 minutes to get home and I had to park in Narnia again this week.


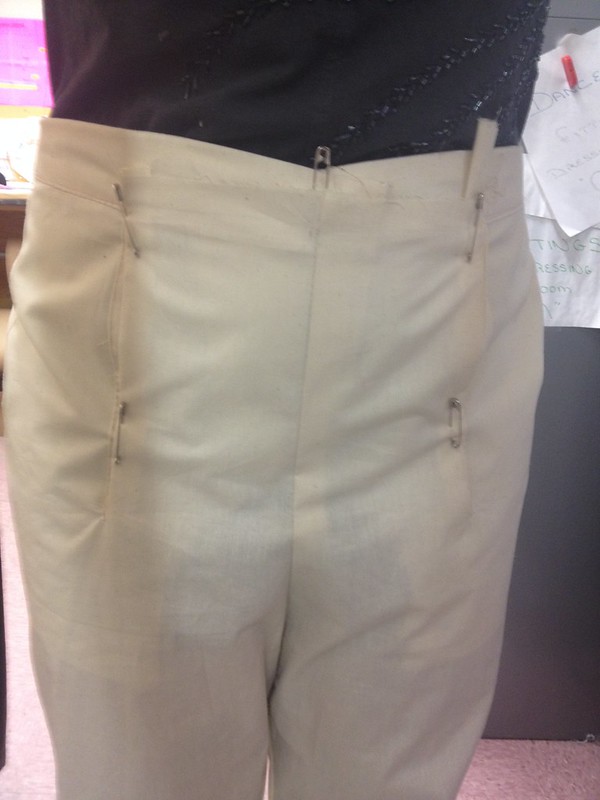
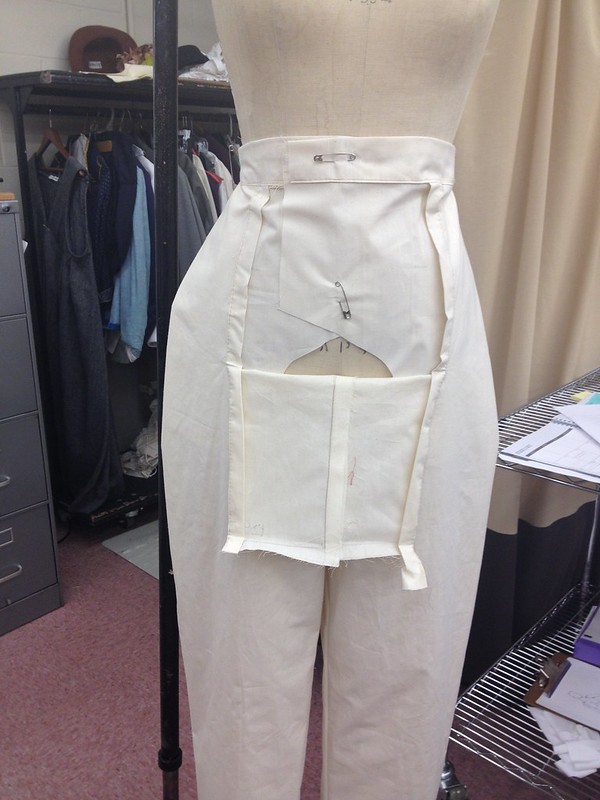
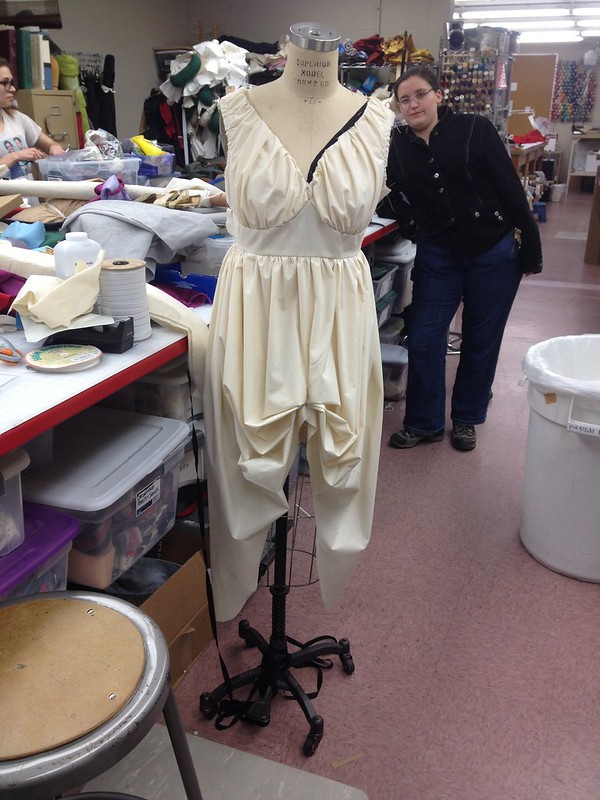
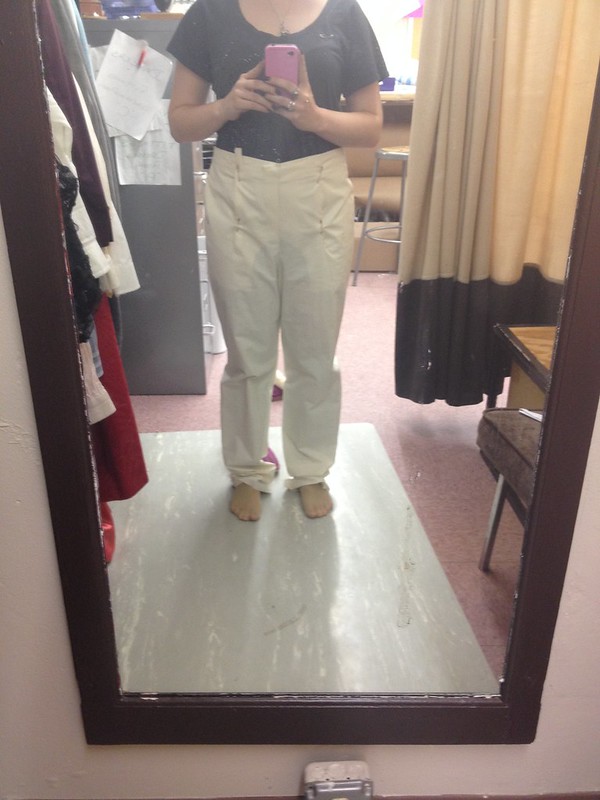
But I did get alot done, I finally got the pants mocked up. I'm still trying to figure out the best way to do these fall front pants, I've seen a lot of different version. I currently have plackets on the slits where it falls, but I'm think of may changing that to a facing. The challenge with these is in the rendering you can not see any buttons or closures. Like I know the concept and shape of how they work now its just choosing which is the best way to actually do it. So for now they are just stitched to together for the fitting. The pants are going to need to be taken on the leg alot. The pattern I based them off of where a lot loser in the leg and crotch then these pants need to be.  I already have to actually fabric, as I've mentioned before, and they have stretch to them which is great.

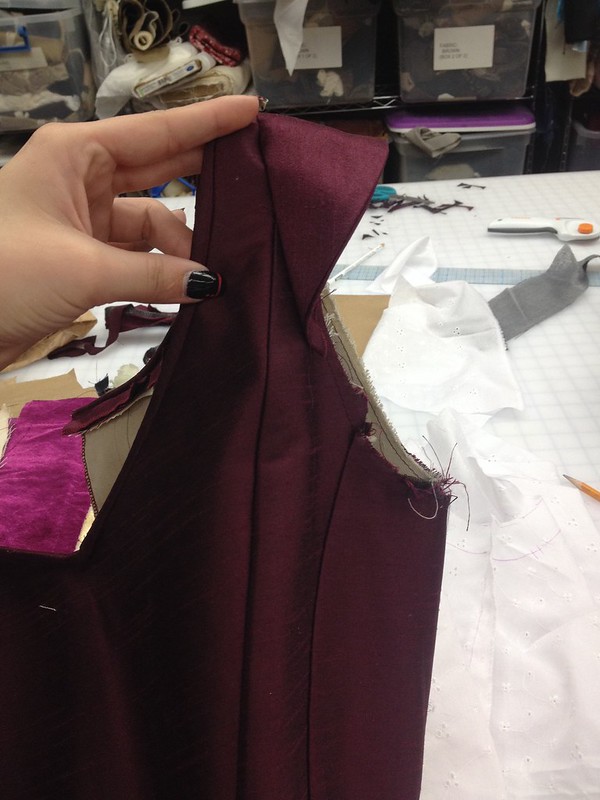
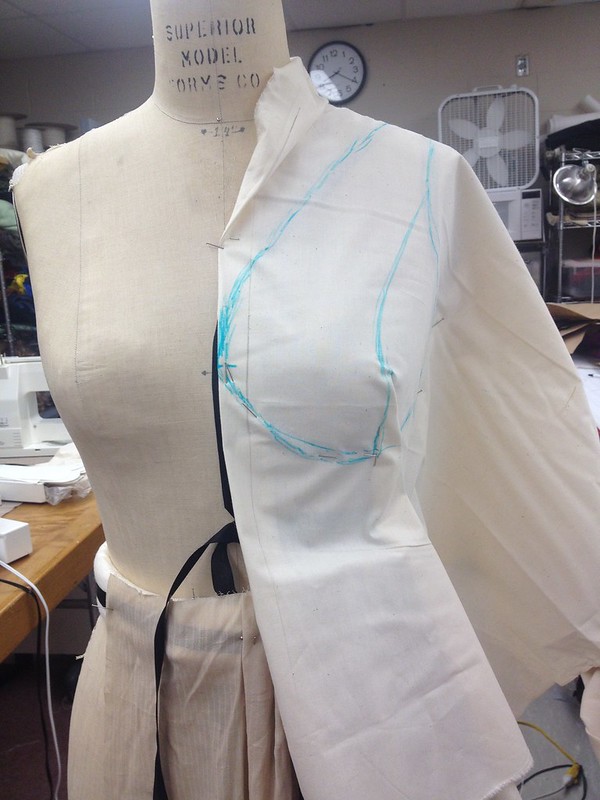
I also got to added all the collars onto the coats they look as good now, I really can't wait to fit them on Zach. I'm just dreading those sleeves, because I know they are wayyyyy to big. I already took the pattern down like 4" in size which should help alot. 

Friday, February 21, 2014

Draping, Draping, Draping

Getting ready to cut some boning!!
Boning case on coutil and boning drying
I got to campus at 9am on Thursday for class, and then I got out of class at 10:15am, those were the only times all day I saw daylight. I was also working on like 2 hours of sleep from the night before, where I was in the Costume Shop till midnight and parking sucks at my apartment so I had to park on the opposite like a mile away, so yeah I was doing great in the morning. I went straight from class to the costume shop, to work as intern and take a few hour break from my project. I was working on altering a bodice pattern for our up coming production of The Rover, I was only working for about 3 hours so I didn't get anything groundbreaking done. Especially since I had to take all the seams out, retrace, add boning casing, cut boning, and then cut the real fabric that will be flat lined to the coutil. Right now everything is cut out it just needs to be but together. It was a nice break to not have to pattern anything for a few hours. We also had a lovely party that was way over due, there was so much delicious food, but since I had been working till midnight the night before I completely forgot to bring anything.

Front Bodice
Front Bodice with waist band draped
After that I went straight to start draping the women's costume. On tuesday Howard gave me a 20 minute how to drape lesson and then sent me off. Luckily I already have an idea of how it works, its really not difficult. I worked on it for hours, it was actually quiet fun, a nice change from all the flat patterning of the male I've been working on for the past few week. I get to work in the dressing room by myself which is nice mostly because I can watch tv or put on what ever music I like. There is always something strange about watch TV at school, like I feel like your not suppose to. Any way the night before I had discovered on the BBC iPlayer there is this show called the Great British Sewing Bee, so i obviously had to check it out. I was watching it while working and then Howard came in and it was quiet entertaining to hear his comments about the show. Especially since the people on it aren't that good, like half them didn't know what under-stitching was. Like they had 2 hours to constructed a sleeveless top with facing and button loop, they had the pattern already and didn't have to fit it to anyone. Some of them where really struggling, it times like these when I actually start to feel like I actually know shit and this whole college thing actually paid off. 

Back of bodice with same
 gathering effect and waistband
Under Bodice Front
Anyway back to the draping, the female only and has like 3 pieces compared to the males 5 pieces. She has a bodice, over skirt and basic underskirt. The trickiest was balancing the bodice gathering, in the picture you can see that it is gathered on the bodice at the neckline and waistband, but across the apex of the bust it lays flat (or the bust fills that space). I had to find the right straight of grain to be able to figure it out, its not the normal parallel with centre front. I was able to find it pretty quickly and then it was just about making sure there was the right amount of gathering. The women in the rendering has a large bust then my actor does and may dress form does so it was about making it loyal to the rendering, but also make sure it fits my actor.
That is a common problem one will face in costumes, a designer will design before there is an actor and as the person constructing it you have to make sure the costume fits the actor and is still what is on the paper. 

Me on the table 
Once I got the bodice front, back and waistbands done I had to relocate as there was a dress parade for Hedda Gabler starting at 5:30pm. Since the shop closes at 5pm no one is in there was it worked just a niceley. I actually really love being in the shop after hours just me, it may sound strange but I really like
TABLE!!!!
working when sitting on the table. I'm pretty sure the random people that walk past just think I'm nuts just sitting on table of the table working. But when I moved in there is was time to take what a draped and make a paper pattern. So you basically just mark everything that is on your dressform and when you take it off you lay it flat with all you marking on the fabric, on some oak tag paper. You then have to transfer all the marking, you do this using a tracing wheel that poked little whole through the paper but not the fabric, so that it light marks everything. You then make all you lines and markings pretty use your rulers and curves, now today I accidentally broke a dressmaker curve which suck but whatever, so
I was using a different curve which works just fine. Since the whole bodice its gathered, I when ahead and made an under bodice, that meant it also had to mark a lot of notches to make sure everything gets gathered in the right place. Especially since the centre front doesn't fall straight it will have to attach to the waistband at jus the place.
Do you see all those
safety pins?
Underskirt being draped
All draped

After I was done with the bodice I moved on to the skirts, the underskirt is really, really, simply its just a rectangle gathered straight across. The pattern isn't even the whole one its just a rectangle the is 11" wide that say extend 30" to the floor, so you save paper and time. The over skirt is a little more tricky, like I could see how it was done, it was just find the right way to mark the gather in the middle and pin it the right way so it drapes the right way. I think I got it after a little playing and a 100 safe pins later.
Patterns for the night
All my patterns so far
The pattern looks funny, and since there is a lot of specific gathers in this a lot of notching and marks had to be made and also had to double check that every piece lines up with the other. I got almost all the draping done and into paper patterns, the only thing I have left to drape is the back under skirt and over skirt. I'm then going to have to flat pattern the sleeve, but
luckily I actually did a sleeve very similar to this two years ago for my Pattern Drafting final, and I still have that pattern to look at. So I don't anticipate that being difficult. I still just need to add sleeve to the
males coat and his mock ups will be completely finished until the fittings.

Thursday, February 20, 2014

Drafting Patterns....

I've been in this project for about a month now, I'm catching everyone up on the process so far.
So all I was given the from the start was image of the 1800 German Couple, that is it. I just want to emphasise that, because as I begun my research I found many Blogs of people how have also made garments of this time period, and most of them brought or used some sort of commercial historical patterns. None of them seemed to draft the pattern from scratch using just slopers, I'm mostly talking about the male who's is drafted, the female is going to be draped. Where I didn't have this, while I could have easily found a coat or shirt pattern that could be easy to alter to the image, I made a decide to make this from scratch as much as I could.

I've been given two actor Maggie and Zach to fit each costume to. I had to take all there measurements myself so if something is off its my doing. Now I'm starting drafting the male, my professor Howard somehow has an unopened vest pattern from like 1993 in his office he gives to me to work with. That is after I had already successfully created a sloper for Zach modifying a basic fit pattern. The original patten one I used was the Butterick 5746 its just a basic fit pattern for women in a size 12. And Zach is small a 31" waist and 38" chest, so a women's size 12 actually is about his size. So I modified the pattern for a man and too Zach size. But Howard said it looked to small, so he skipped to his office and came out with his vest pattern that also has pants. He was soo excited, the vest was in Zach size but his size in a 1993 style vest. To make Howard happy I used that pattern and modified to Zach size. I Cut along the size 38-40 lines, but what Howard didn't realise is that in 1993 a size 38-40 final measurements of a vest was actually about 46-48. I ended up having to take out about 10" after I took out seam allowance. I was basically just creating a whole new pattern from scratch, but I did it I was that base sloper to create the waistcoat, tailcoat, and coat patterns. And it actually works, once I was finished they looked nothing like that 1993 vest pattern.

For the sleeves I found a historical pattern in stock that actually was for a jacket with similar seams so I just used that, the only problem is its for a size 46 which is way to big. I can already tell they are going to have to be completely redone. The pants I decided not to use the one in the same vest pattern, since they are baggy with a fully gathered wait band, which is just to annoying to deal with. I found a historical pants pattern the were just basic pants in Zach size. They aren't as tight and taper as I need them to be, my pants are also fall fronts I had to create that, which once I looked at my research I realised my pattern is actually the difficult or different from normal pants. I didn't worry about the fit around the leg that much, just the the wait, inseam, and outseams were right, because the are so form fitting I'm just going to pin around his leg on the mock up to get the right shape. I already have to fabric for the pants that also magically came from Howard's abyss of an office. I'm excite to get that point with the real fabrics but thats still a long way away.


Wednesday, February 19, 2014

Late Sunday Night Drafting


This was me on sunday doing some 
adjustment to my patterns before I started on my mock up. Patterns patterns and more patterns my Sunday night, don’t let me alone in the dressing room, I watched 9 episodes of breaking bad since I’ve been here and have to be back in 12 hours


Tuesday, February 18, 2014

About this little project

So for my last semester at George Mason University, I'm doing this independent study with Howard, officially its called Advanced Pattern Making. That title does not even come close to what I'm doing. Since I'm going into a career in costume construction, Howard has set up this independent study that basically combines everything I have seen and learned in the past 4 years as a student of Theatre at GMU. I'm constructing from scratch a 1800 German Couple, all I have is a historical rendering to go off of. I must flat pattern and drape everything on my own, using my knowledge of pattern make and research to create the final garments. I have been given two actors to build to and am in charge of taking all their measurements, so if something doesn't match its on me. The whole goal of this independent study is to take me through the process that I would expect from a regional theater. It is definitely going to be a challenge, but this is the sorta of challenge I absolutely love, I seriously couldn't see myself doing anything else. I just wish that when Howard ask my sophomore self what I want to do in theater after graduation I had known then, so I could have done more of these. But in all I feel fully prepare for this and it has been tough and with all the snow days it has delayed our schedule  bit which means extra late nights, but I wouldn't have it any other way.

Here is what I'm making, this is all I was given to being with. In total the men has five pieces to build and the women has two.