 |
| Everything flatlined together |
This is't related to my independent study, I decide to take a little break this weekend from it. But today I did actually get to put together that bodice I mentioned before. I was actually surprised as to how much I got done in just one after noon. Remember I said that I had retraced and cut the fabric out, but nothing was put together. Well it was in that same state when I started today, everything cut out but nothing together. So I started by flatline all the fabric (the pretty outside fabric) with the under coutil fabric. If you don't know what flatlining is its when you lay everything together and top stitch around the edges so that they lay flat together. I did that to all the pieces, there is a CF, 2 SF, 2 SSF, 2 SB, and 2 CB so in total there is 9 pieces to the bodice, and remember that is doubled because those are cut out of the coutil, and then the real fabric. Once I got everything flatlined, I put my seams with a 1/2 inch seam allowance together, which was the CB to SB, SF to SSF, and SSF to CF. I then serged all the seams together and serged the edges of the CB separately and the SB and SSF seams separately since there seam allowance was more then a 1/2 inch. The reason those down get serged together is because if the fit needs to be adjusted, you would either take it in along those seams or let it out. Thats also why there is more seam allowance along those seams.
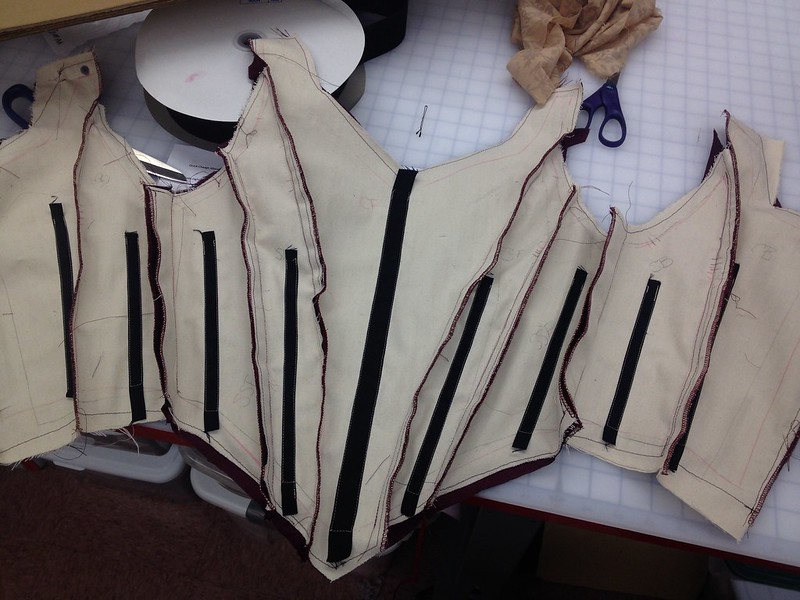 |
Inside coutil, with boning tape. Everything is serged and
stitched together, but no cording yet. |
Seam allowance is costuming is different then in commercial garments. If you buy a commercial pattern the seam allowance is going to be 5/8 inch. Commercial patterns are not made thinking that multiple
people may be wearing this in the future, there for they don't need to be as easily adjustable. In costume you want to put extra seam allowance in, because after the show is done this costume will go into of stock and could be used 20 years down the road, for another actor. Costumes have a long and interesting live they must constantly be evolving from show to show, that is why in costuming things are constructed differently then in commercial or fashion wear. It doesn't mean one way is easier they just emphasise different things. For one in costumes an important part is what type of closure is being used, does it need to be a historical closure or a closure for a quick change. In commercial/fashion sewing that isn't as important, the more important question would be if its aesthetically pleasing.
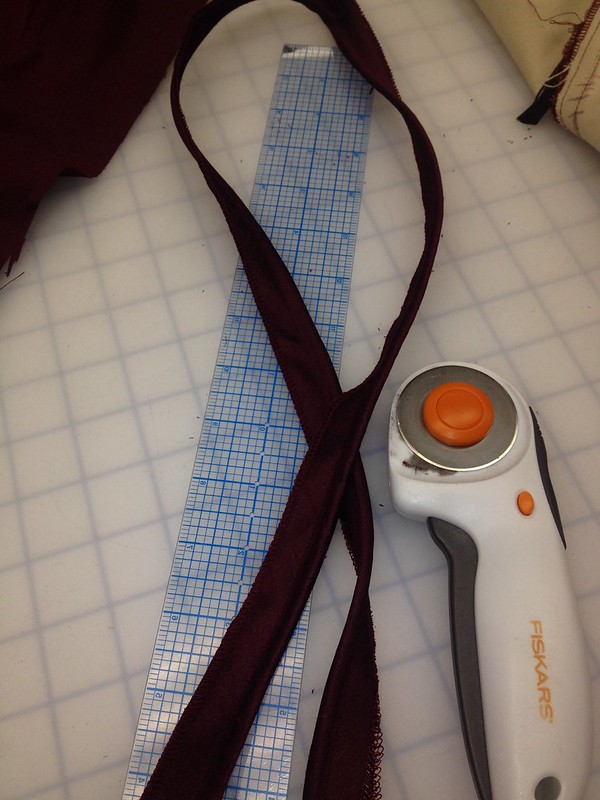 |
| Cording before its attached to bodice |
So back to the bodice after I serged everything, I stitched the SB and SSF seams together . I then began to cut bias tape for the cording that will go around the neckline and around the waist. Cording or piping is a common way to finish off edges and can also be use to add a decorative touch, if you use a
 |
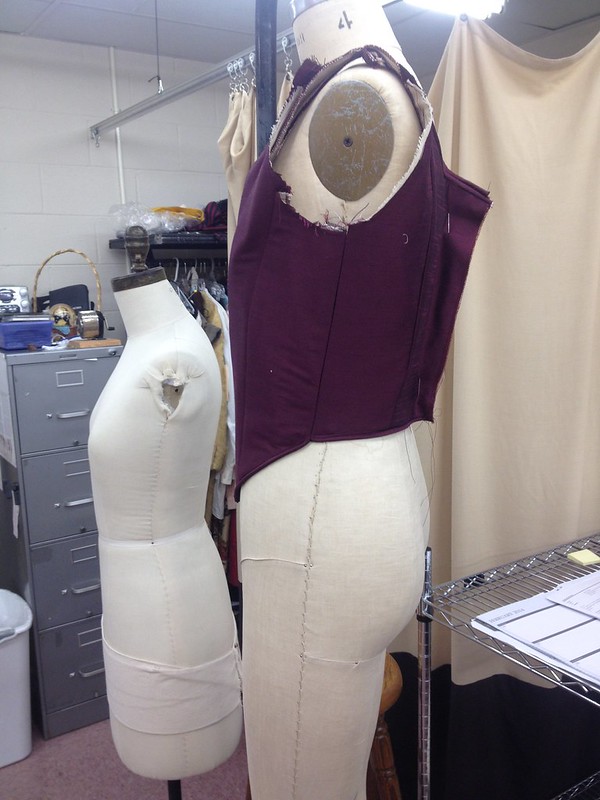
Bodice almost finished with cording around
neck and waist |
different pattern or add it to outline seams to make them stand out. In this case we are finishing off the edges, so it was cut with the same fabric. You make cording by cutting 2" strips of fabric cut on the bias. The bias is when the fabric is cut at a 45 degree angle across the grain, when fabric is cut on the bias it has a stretch that allows if to bend easily around curves and shapes. Your then take a cord and fold the fabric around it, like a hotdog in-between the buns. Using a zipper foot you then stitch as closely to the cord as possible to incase it. After I did all that I serged the cording for a finished edge. I then stitced the cording around the neckline in the front and back. I had to slit the side seams a little bit because I forgot that the cording goes on those pieces before they are stitch together and I put the cording at the waist and stitch back up the side seams. I then trims the extra seam allowance on the bodice to be even with the cording's seam allowance, so it look nicer on the inside. I made sure to clip around the edges along to curves so that it would lay flat and then pressed everything down and to the right side. Once everything was press I went back and top stitch around the neckline and waistline to make sure the cording lay flat. I also forgot to mention before that I had but all the boning in the bodice before hand. After I did all that there was nothing left for me to do, I just put the shoulder seams together, but the bodice is going to have some off the shoulder sleeves. But I havn't been told what fabric those are going to be cut out of so I have to wait to put those on. I also don't know what kind of CB closure this is getting so I wasn't able to move to that step yet, but thats ok because I didn't expect to get that far this after noon anyway so hopefully I can finish it by the end of the week. Which I think is completely do able.
What's nice about this is I didn't have to worry about patterning or fitting anyone I just go to put it together. It a relive when you just get told here sew this together and thats it.
 |
Back view you can see that there
isn't a back closure yet |
 |
| Side veiw |
No comments:
Post a Comment